If you want to use HubSpot as a source of truth for your sales pipeline and forecast, you need deal pipelines that are meticulously configured and maintained. There's no way around it.
We know that incomplete data leads to poor decision-making. According to Gartner, it costs businesses an estimated $12.9 million every year.
Maintaining your deal pipeline may sound straightforward, but if you've managed a sales team, you know it's easier said than done. Staying on top of every deal can be a tall order. But if you want accurate data, you need to maintain your deals.
Fortunately, there are many ways to reduce administrative burden and automate deal pipeline maintenance in Hubspot – freeing up your sales team to do more sales and less admin. Let's dive in.
Take Advantage of Pipeline Automation
In HubSpot, automated workflows are more than just a feature — they comprise the main engine that drives efficiency, especially when managing your deal pipeline.
Pipeline workflows allow you to automate the progression of deals through various stages based on predefined criteria, helping your sales process move forward with minimal friction and manual effort.
Understanding Automated Workflows
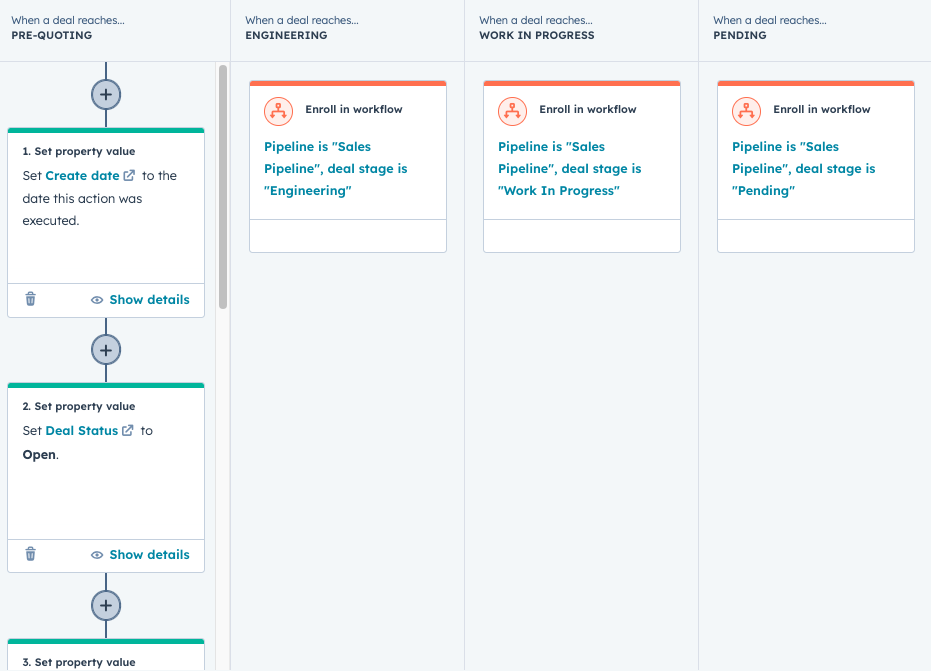
With deal-based workflows, you can automatically update a deal's stage, properties and related activities when certain criteria are met.
For instance, if a prospect signs a proposal, the deal can be moved from the "Proposal Sent" stage to the "Negotiation" stage, and the workflow can assign corresponding tasks and provide internal and external communications – all without any manual effort from your sales team.
How to Set Up Workflows for Deal Stages
- Define Your Triggers: First, identify the actions or conditions that will trigger the deal to move to the next stage. This could be anything from email engagements and task completions to form submissions.
- Create the Workflow: Navigate to the workflows section and choose to create a new workflow. Select "Deal-based" as the workflow type. (You can also create deal pipeline automation from the pipeline settings, but workflows will give you more flexibility.)
- Set Up the Criteria: Specify the criteria that must be met for the deal to advance stages. This involves setting up the conditions based on deal properties, such as deal value, activity, or custom fields relevant to your sales process.
- Choose the Action: Once the trigger conditions are met, select the appropriate action. In this case, the action would be updating the deal stage to the next appropriate step in your pipeline.
- Test and Activate: Before activating your workflow, be sure to test and confirm it works as expected. HubSpot offers testing features that simulate the workflow process.
Benefits of Automating Deal Stages
- Increased Efficiency: Automated workflows reduce the need for manual updates, allowing your sales team to focus more on selling and less on administrative tasks.
- Consistency and Accuracy: Automation ensures that deals are moved through stages based on consistent criteria, reducing the chance of human error and supporting a more standardized sales process.
- Faster Sales Cycles: By automating the progression of deals through the pipeline, you can shorten the sales cycle, enabling your team to close deals faster.
By setting up workflows for deal stages, you can begin to automate deal pipeline maintenance in HubSpot, a big step toward operational efficiency.
Use Conditional Stage Properties
One of the biggest challenges in deal maintenance tends to be missing data. Even if your team is great at creating a deal for every opportunity, if they're failing to enter critical information like close dates or deal amounts, that data will have limited usefulness.
To prevent this issue, we recommend using conditional stage properties – which lets you customize which deal properties are visible and required when users update deals to a specific stage.
For example, if your ideal process states that any deal at the discovery stage must have the amount recorded, you could add a required Amount conditional stage property so that users are forced to enter this before they can make the update.

To customize your conditional stage properties:
- Go to the pipeline you want to edit.
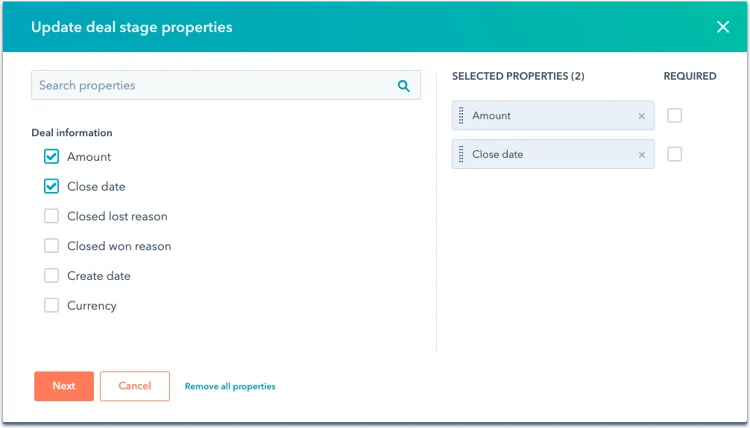
- In the row of a stage, hover over the Conditional stage properties column and select Edit properties.
- In the dialog box, select the checkboxes next to any new properties you want to show.
- To require a property value, select the checkbox in the Required column.
- To reorder the properties, click and drag them to a new position.
- To remove a selected property, click the X next to that property in the Selected Properties column.
- Once you've selected your properties, click Next. The properties you've selected will automatically appear when manually creating a new deal in that stage or when moving an existing deal to that stage.
- Once you're done editing, click Save in the bottom left.
Apply Pipeline Rules
A newer feature, HubSpot's Pipeline Rules provides a new way to ensure your deals conform to your processes with less manual oversight by allowing you to restrict how users can update deals.
Sales team prone to skipping deal stages, which throws off the funnel reporting? Problem solved: you can prevent deals from skipping stages. Are deals often getting created later in the pipeline rather than at the beginning where they should be? Head this off by limiting deal creation to a single stage.
Currently, there are four rules available to apply (note: these rules don't apply to super admins or users with permission to edit property settings):

While you can select multiple rules at once, if this is new territory, we recommend applying one rule at a time so you can monitor and ensure there are no issues before introducing the next one.
Set Up Rules for Pushed Deals
Along with missing data and deals skipping stages, pushed deals (deals that surpass their expected close date) are often the next most common challenge in maintaining a clean deal pipeline.
Some amounts of pushed deals are unavoidable for most businesses – and staying on top of them can be a pain. In our previous post about leveraging HubSpot's deal push rate, we highlighted a couple of tactics that help automate maintaining these deals.
- Tip #1: Use pipeline automation to trigger a task when any deal surpasses its close date for the owner to update the close date. This reduces the chance that your team fails to update the close dates for pushed deals, keeping your pipeline and forecast accurate.
- Tip #2: Create a custom radio select deal property for deal push reason with the most common reasons a given deal might be delayed. When you trigger the task for the deal owner to update deals past their close date, drop this property in the task for them to include a reason so that you're not only tracking when deals get pushed – but WHY.
Bonus Tip: Create Automated Forecast Reports
While this is technically a reporting feature, you can also create an automated forecast report in HubSpot that should help keep your deal pipeline up-to-date.
By automating forecast reports to be sent out regularly, you're both a) making it easy to spot data inaccuracies and b) incentivizing your team to keep their deals current and accurate as they know they'll be reviewed every week (or however often you choose to have them sent).
For more information and step-by-step instructions, check out our blog on how to create an automated report in HubSpot.
Next Steps
While these are not the only ways to automate deal pipeline maintenance in HubSpot, these are all good places to start. Most likely, once you make one improvement that automates your sales operations, you'll be excited to layer on more.
Get more tips and insights monthly by subscribing to our newsletter at the top of this post, or reach out to learn how we can help you optimize your HubSpot environment.