Always find yourself on the go, traveling to meetings with prospects, leads and clients?
In Chicago, one client visit can easily eat up half of your day due to the city’s lovely traffic. While I don’t have a fix for the Chicago commute, I did recently learn of a way you can get more accomplished during your travels.
Google Maps.
Yes, Google Maps. How? It can be used as an extension of your current CRM that serves to map out the location of all your contacts, making it a useful tool for the always-busy salesperson.
Why You Should Map Your Clients, Leads and Opportunities
If you’re unable to visualize your clients geographically, you’re putting yourself at a major disadvantage. Why?
Missed opportunities and wasted time.
When you drive downtown to meet a with a client, have you considered what other clients or opportunities are located around the same area? How many more client touches you could have while you’re in the area, instead of making multiple trips on different days to connect with each contact?
Google Maps can eliminate these uncertainties by mapping out everyone in your sales funnel. With a map of every client and opportunity available at your fingertips, getting the most out of your day becomes a whole lot easier.
How to Use Google Maps as a CRM
First things first: you need to have a Google account to use Go
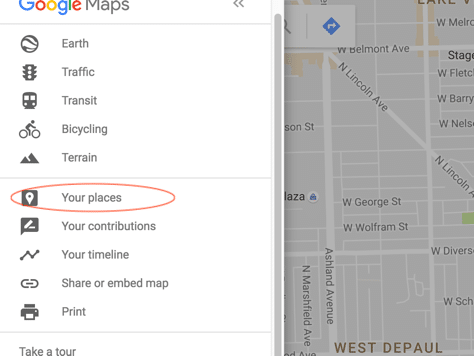
ogle Maps. Once you’ve signed in, go to Google Maps and hit the menu button.

In the menu, click the “Your Places” option.
Head over to the Maps tab and click “Create Map.”

This is where the fun begins.
After naming your map, you can begin to upload your sales contacts, which you’ll need to export from your customer database. In order to do this, you need to import your contacts into layers, which will be used to help you organize your map. Create three separate layers: one for prospects, one for opportunities and one for clients; this will allow you to easily tell each type of contact apart when viewing your map. Feel free to break up your contact list into different layers in any other way that is useful for you, such as creating layers for hot or cold leads. After you’ve created the necessary layers, you will need to upload each set of contacts into the matching layer.

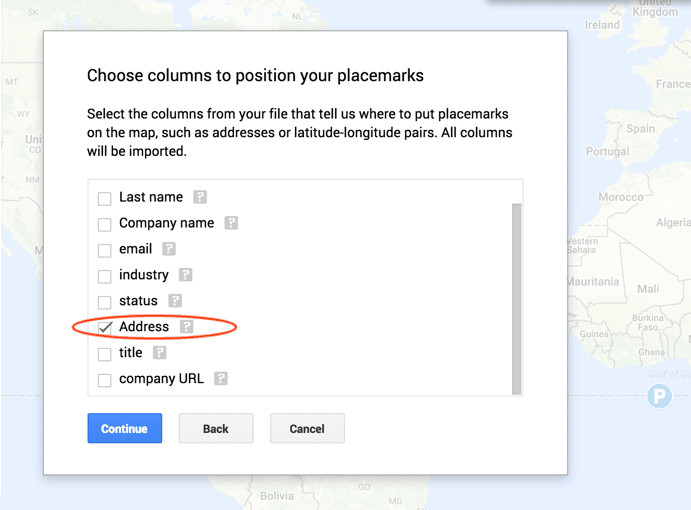
When prompted to check off columns, make sure you only check the ones with location contained in the cell so that Google can map the addresses. Even though you’ll only check the address option, Google does import all the information in your spreadsheet.
If all goes well, your map should come out looking something like this:
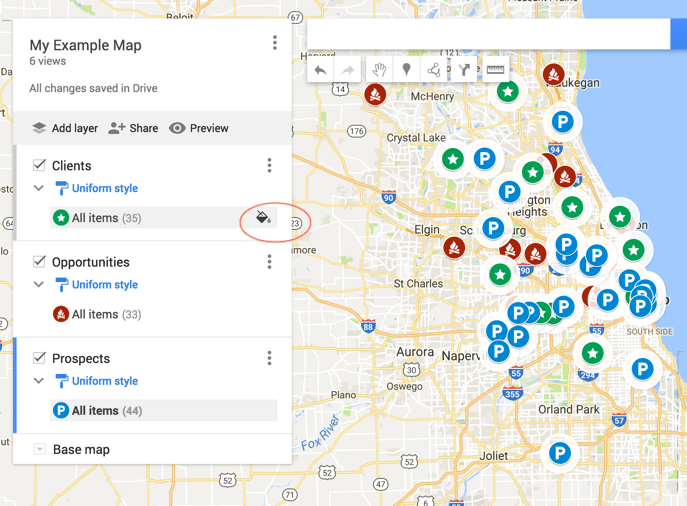
To help differentiate the multiple categories you’ve added, change the icons so each one has a separate one associated with it. To do this, hover over the “All items” section on the category icon you want to change. Then click on the paint can (circled in the image above). You will see many colors and icons to choose from.
You now can fully visualize your sales funnel. Congrats!
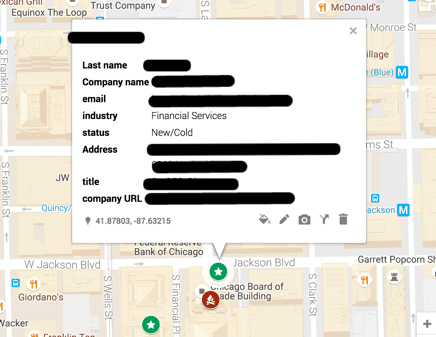
All the contact information you imported can be viewed by clicking on a contact’s icon on the map.
If you want to break down your map even further, you can visualize other fields in your customer database (i.e. industry, company size, etc.). Simply click on the paint roller icon and a box will appear to let you decide how you want to split the category.

One caveat to “My Maps” is that there is no way to have it sync with your CRM database, meaning it will have to be updated manually as you add and remove contacts.
Advantages to Mapping Contacts
Visualizing your sales funnel can really help you maximize your day. Say you’re going to visit a client in the Loop but you work on the North Side. When you look at the client on your contacts map you can quickly see other opportunities around the same area.
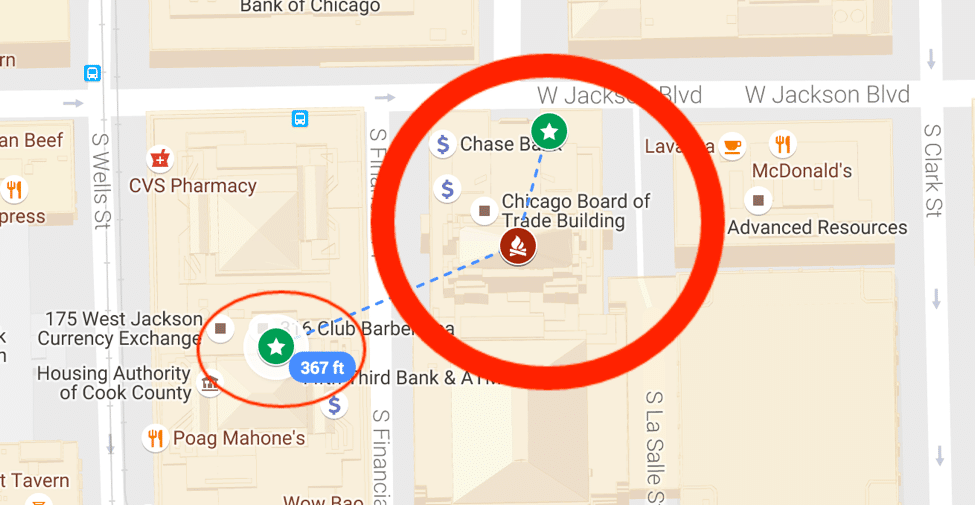
In the example above, we have two clients (green stars) and an opportunity (red fire). If you are planning a client meeting with the client on Jackson, a quick check of your map that there is an opportunity in the same building! You could try to schedule a meeting with that opportunity after your client meeting, or maybe just drop by to introduce yourself. After you spend a little extra time meeting with an opportunity, you could even stop by and visit another client that is less than 300 feet away. No matter which route you choose, you’ll end up being more productive than if you simply visited one client and drove back to the office.
While downtown Chicago has plenty of examples of businesses in close proximity, a potentially better use of Google Maps is to efficiently plan trips to more remote areas. If you need to drive to another city, Google Maps is perfect for quickly checking if any other opportunities are available in the area.
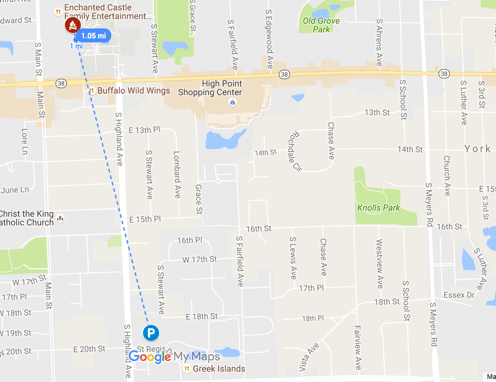
Our map shows that there is a prospect and an opportunity within a mile of each other in York Center. Unless you want to make the trip to York Center twice, you can save time by planning to make two stops on the same trip.
Google Maps is a great tool that not enough sales teams are taking advantage of. By visualizing your contacts, you are able to meet more opportunities and make better use of your travel time.
Now create your map and hit the road!
Thank you Switchfast for the tip!